With the rate that the VSTS team releases with all the features they releasing it's hard to know everything that exists in VSTS. I recently needed to migrate git repos from various Team Project Collections (TPC) into a single Team Project and started out doing it very manually and slowly progresses to importing over 100 in a couple hours ![]() .
.
I'll take you through all the steps I performed to get to the very quick method but obviously you can skip to the bottom if you don't care much for the other details.
In this post the aim is to move all repos from a collection called DefaultCollection from each of it's Team Projects (GitHub-Projects and Scrum-Git) to a new collection called testcoll into a team project called testtp.
Creating a new git repo
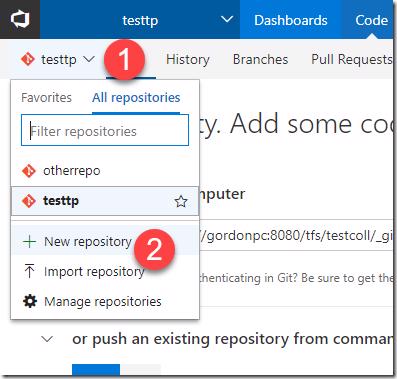
I'm dropping this in here because in 2 of the sections we'll need to do this so felt right to just through it out there ![]() . I'm going to head over to the code hub in the team project testtp
. I'm going to head over to the code hub in the team project testtp
Next click on the repos drop list and then on New repository
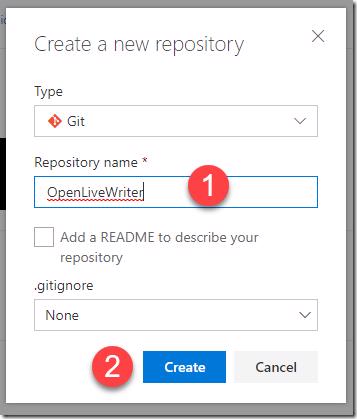
I'm going to use create a repo for OpenLiveWriter
- Type the name of the new repo
- Click the Create button
We are moving code into this repo we'll leave no read me or default .gitignore
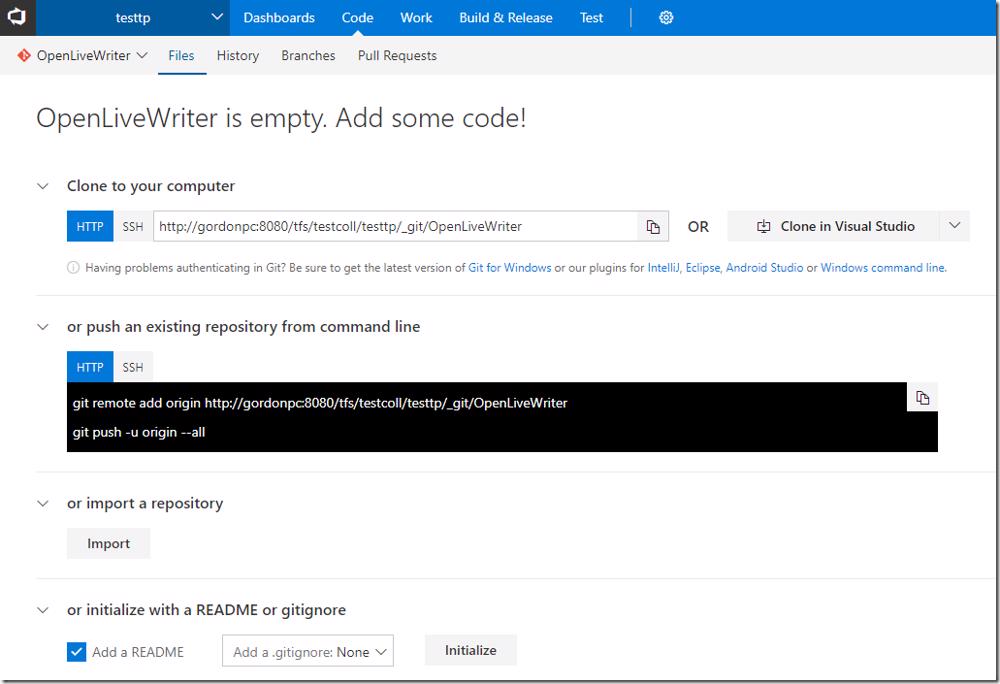
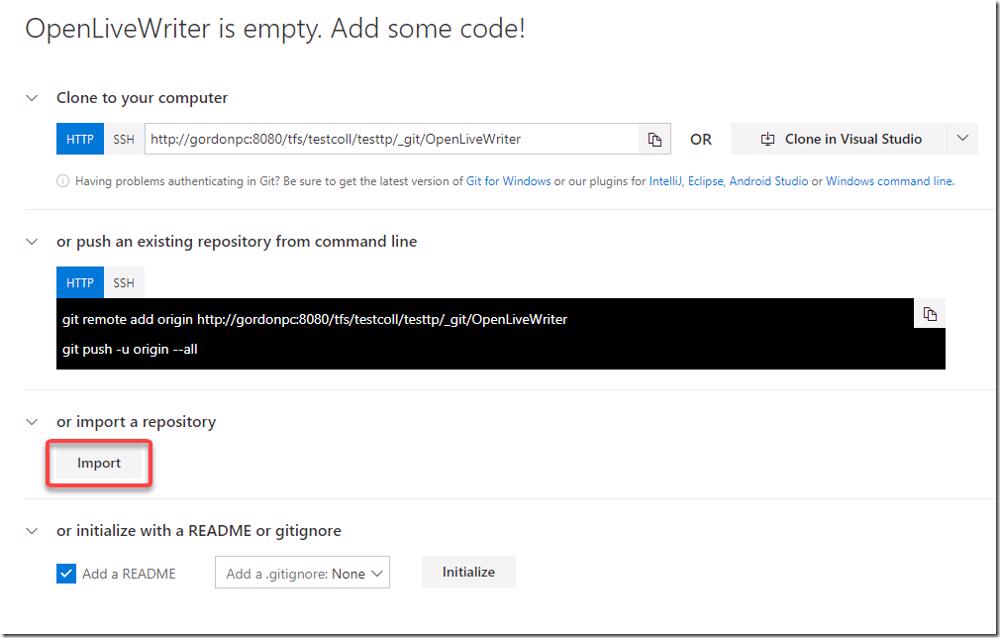
You now have an empty repo and you are given a bunch of ways that you can start getting code into this repo
That's all to create a repo, let's move on
Creating a PAT token
Also not strictly part of what's required and should be it's own post but doesn't really have 'enough' steps so just adding it in here ![]() .
.
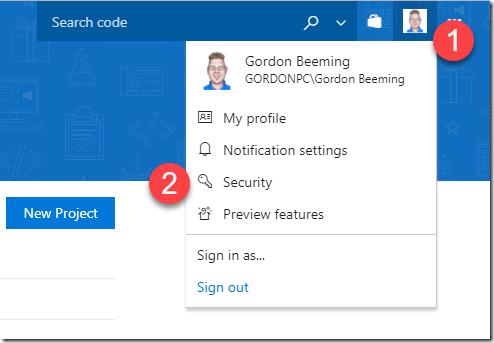
- Hover your profile picture
- Click on security
This will bring up the Personal access tokens screen where you can come back to later to revoke the token you will create now. Click Add
- Enter a name for the token that will allow you to remember what you created it for
- Select how long you want the token to be valid for
- Click Create Token
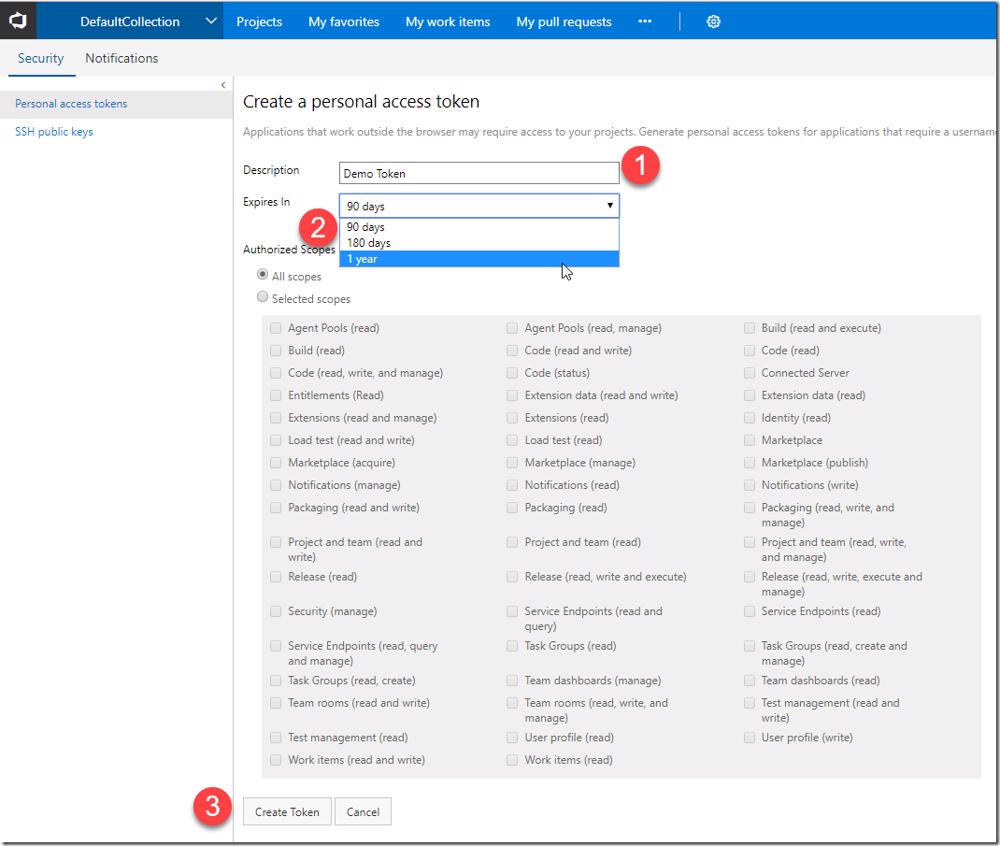
Your token will now be shown to you copy this out and keep it safe. This token will not be shown to you again and using this token someone can impersonate you for the scopes the token is valid for which in the case above is everything
Very manual
I started out using the command line, it was the least automated and probably close to what the tools are doing under the covers anyway. To start off I created a new repo (I'll use the OLW repo from above).
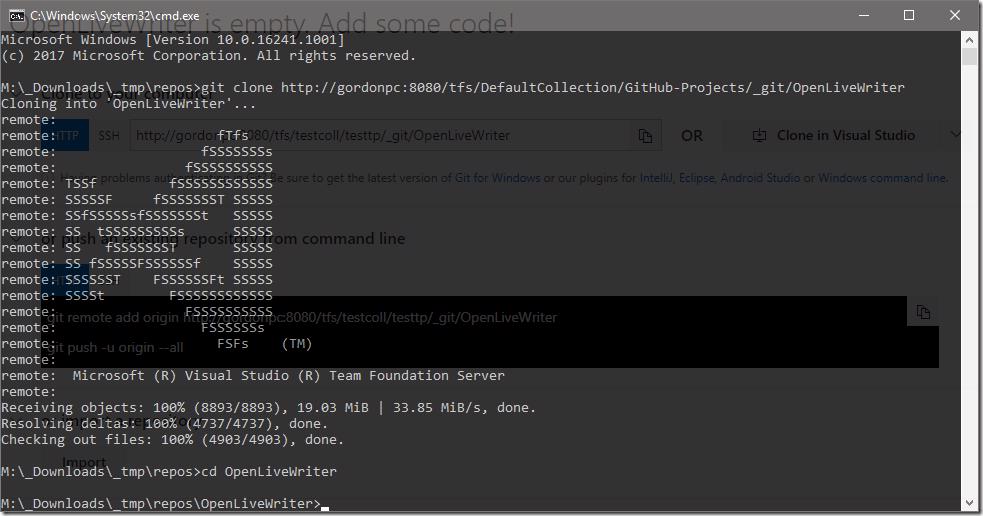
First step is to clone the code from the source repo to my local machine. We'll clone the repo and then cd into the new directory
This will give the below output
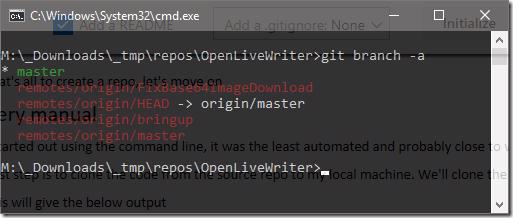
If we list all the branches we have locally you'll notice that we only have the 1 local branch but there are a bunch on origin
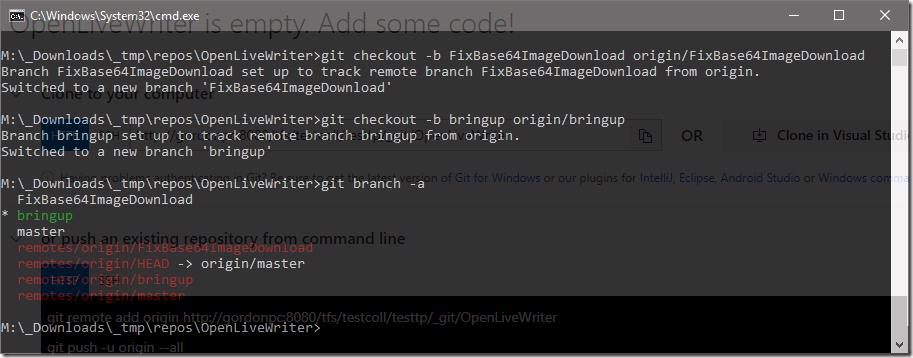
The problem here is that we only have 1 repo locally so if we push this into the new project we won't have all our code. Let's checkout all those branches
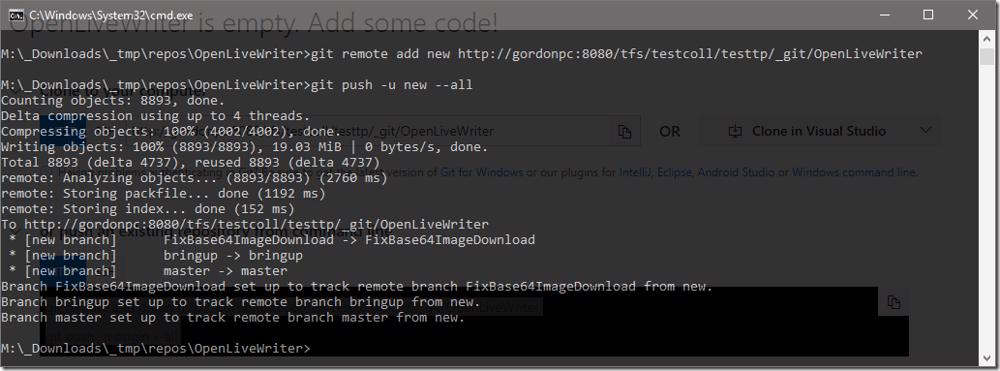
I'm not the best at using git CMD so potentially there is a git checkoutmagic but I couldn't find it, with this in mind you can see how with lots of branches how time consuming this can be. Now we have all branches locally we can push them into the new repo.
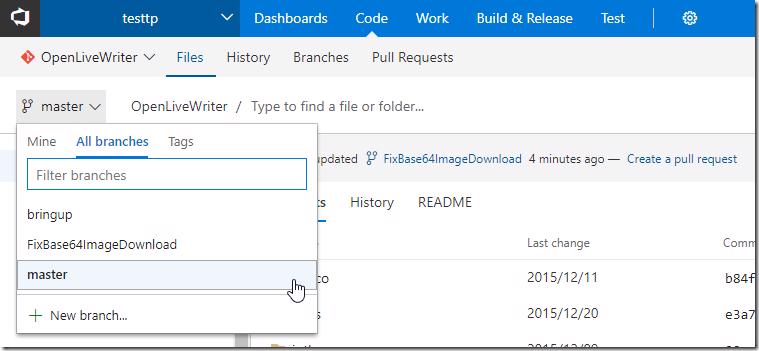
If we refresh the new repo in the browser you can see we now have all the branches and the repo is ready to use in the new team project.
That method is quiet long and I'd only recommend you do that if your TFS server can't see the source repo, even then I'd consider writing an app if there is a lot of repos to import.
VSTS Import repository
For some reason this is the feature that I didn't know about and didn't stay long enough on the start page to read ![]() .
.
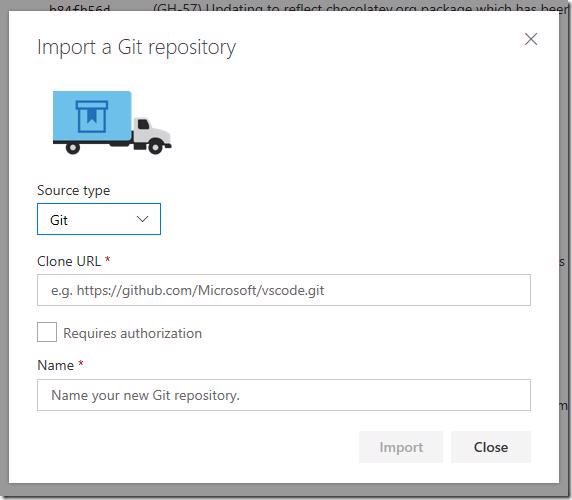
basically in this scenario you click the import button above and then
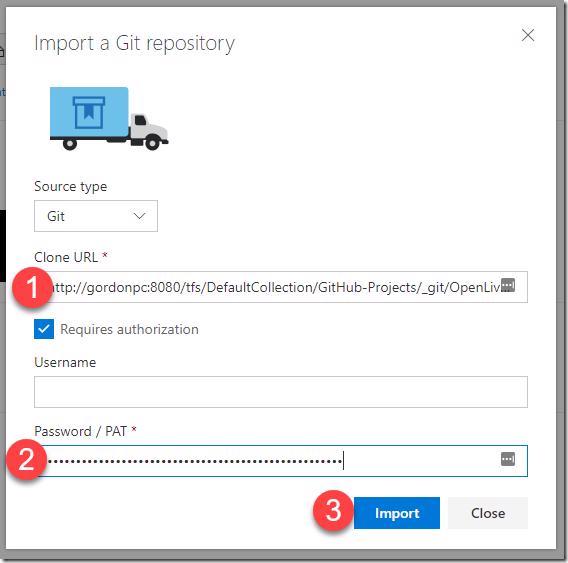
- Enter the url to the repo you are cloning
- I use a PAT token (explained above how to create one) instead of a username and password
- Click Import
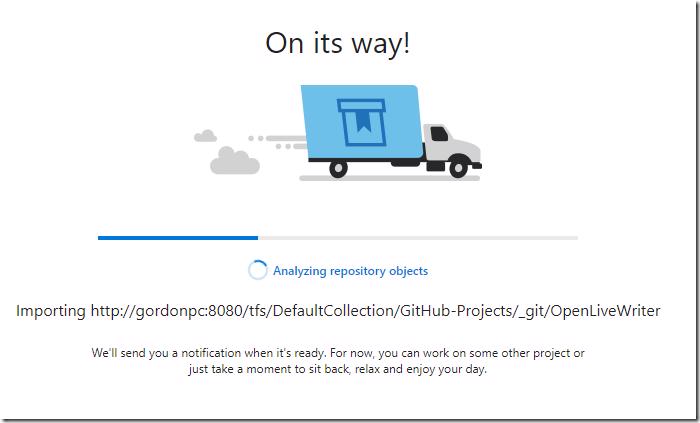
Shortly you will be shown the busy screen where the delivery van of amazingness allows me to have coffee instead of checkout branches ![]()
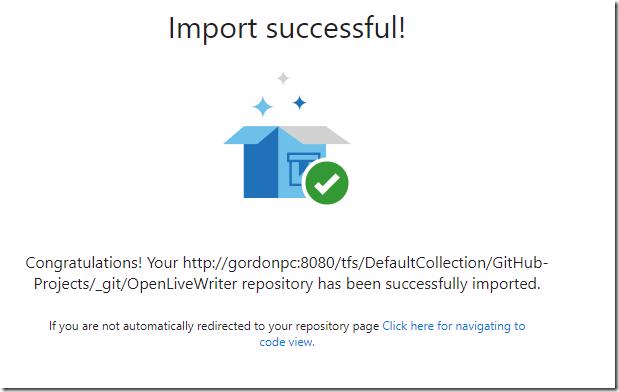
and then it's all complete
And checking the branches again would show that all branches exist.
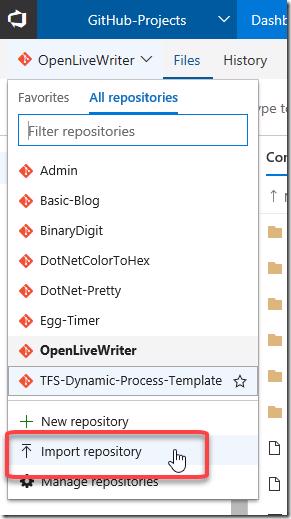
Update: So adding this to the end of this section but the PM pointed out to me as I published this article (but I haven't been able to update it since ![]() ) that it's actually simpler then what I have above, in the context menu there is an import repository button which I have in another screenshot and didn't even notice
) that it's actually simpler then what I have above, in the context menu there is an import repository button which I have in another screenshot and didn't even notice ![]()
this brings up a similar import dialog but this time asks you what the repo name is at the same time
I guess habit and routine makes you blind.
Sit back and relax
This method admittedly takes a lot more upfront time if you me because I had to write the code and get the right apis from the VSTS REST API Overview docs site, but for you it's where it's slightly longer than the import a single repo of effort but then a whole bunch of coffee while magic happens.
Next download this sample project from GitHub (Gordon-Beeming/Import-Multiple-GitRepos-In-Vsts). In program.cs there is a couple constants to replace (yes this can be made into an amazing utility but for now it's an MVP ![]() ).
).
- SourceTeamProjectCollection: This is the collection you are copying from
- TargetTeamProjectCollection: This is the collection where you want to clone your repo too
- TargetTeamProject: The team project where you want to clone all the repos too
- TargetTeamProjectId: This is less obvious to get but you can easily get it by browsing the an api in your browser for any repo you currently have in the team project
This code assumes that you are cloning the code within the same TFS account but you can modify it to clone across 2 separate servers or 2 different VSTS accounts or even TFS to VSTS, you get the picture ![]() . Around line 20 set the BaseUri assuming you not modifying the code for now.
. Around line 20 set the BaseUri assuming you not modifying the code for now.
Listing repos to import
Around like 27 is a method WriteSampleImportFile() that you can now uncomment and then run the app, make sure you have the PAT token handy that you can create using the steps above
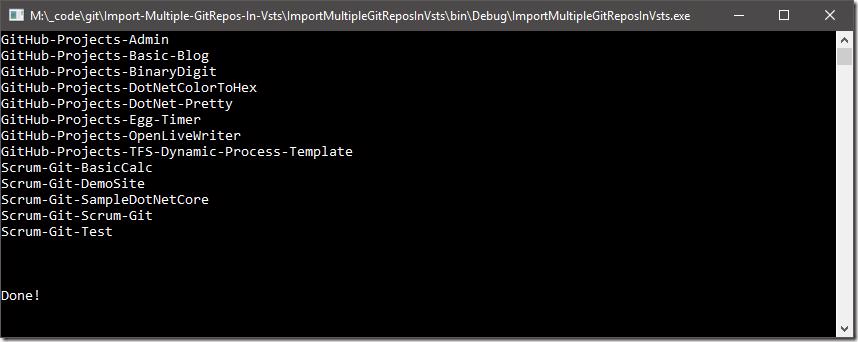
After a small bit you'll see an output listing all the repos in the source collection specified
Navigate to your bin debug folder and open the output.txt
We now have the base input file for importing a bunch of repos into our new collection
Importing repos that we listed
You can now comment out lines (using #) you don't want to import because maybe you already have and also edit the name that the repo will be imported as. In my case we were importing from a collection that had lots of team projects so I decided to by default prefix the source team project name for the repo name and then I also replace spaces with dashes. When you have made the changes you want you can simply save the file as input.txt next to the output.txt
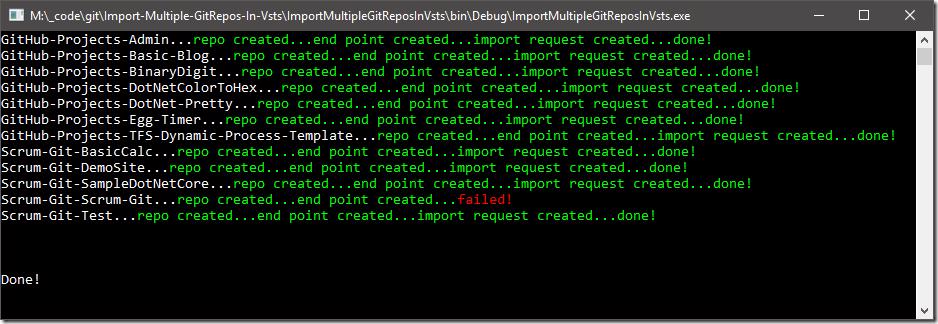
comment out the WriteSampleImportFile() method again and uncomment the ImportReposFromFile() method. Run the app and you should see a bunch of green and if you unlucky you'll see some red.
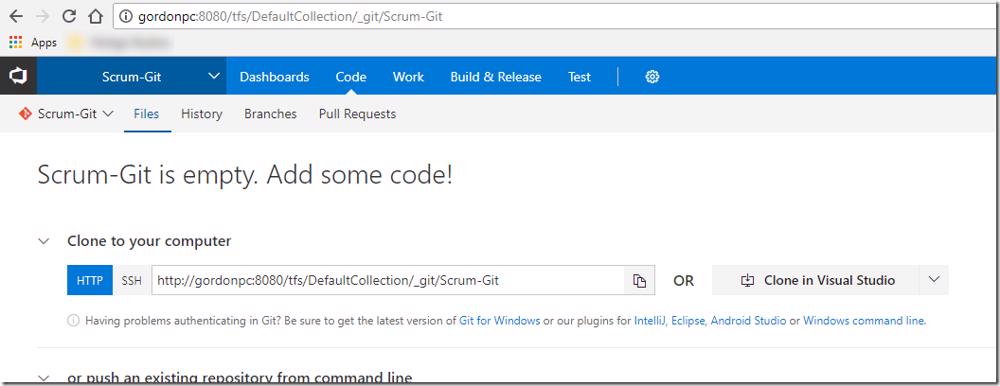
If you see red like above it generally means that that repo is empty in the source collection so comment those out in your import file maybe before running the app ![]() .
.
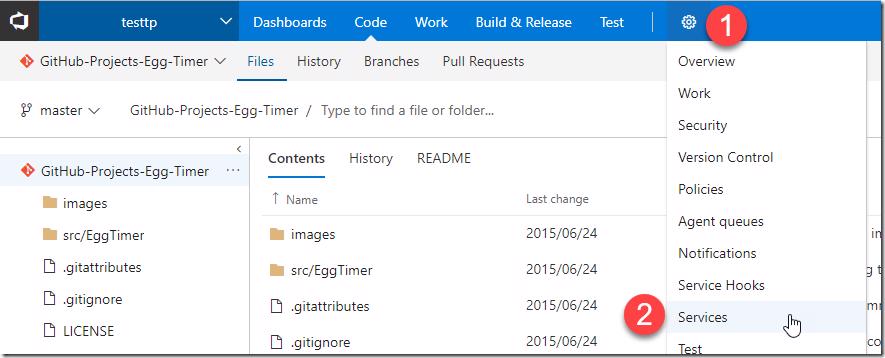
Other things you'll get red of is if the repo already exists, all these things can be added to the app but was extra code that I didn't need for the MVP. I must let you know though if you do see red like above head over to your service end points and disconnect the service end point for the failed end point. Click on the settings button and then on services
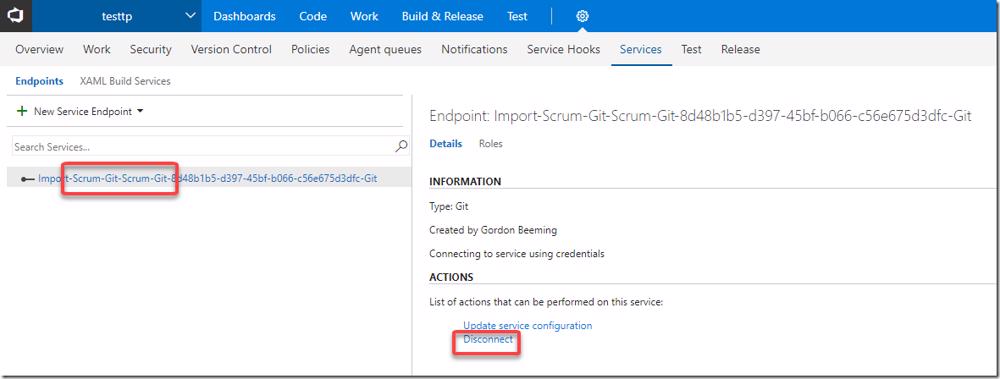
Find the service named similar to the repo that failed for you and click disconnect
It's normal to see other end points in this list that didn't fail, those repos are still processing. Another thing that could have been added to the app would be monitoring the status but I chose to monitor the end points list instead and also then check the repo that the code was there.
What's happening under the cover?
If you interested you can of course go through the code but a little blurb here will tell you as well ![]() .
.
We get the source url (left side of the input.txt) and new repo name (right side of input.txt) from each line in input.txt, we exclude empty lines and lines that start with a #.
- We take the new repo name and create a new git repo using Create a repository method described in the VSTS APIs.
- We then create a new service end point of type git where we specify the authentication type is username and password and we use the PAT token provided in the console input as the password for this service end point. The url is specified as the source url. For this we use the Create a service endpoint api
- Lastly we use the Create a request to import a repository api to queue the soruce url repo to be imported into the target team project to the new repo we created in step 1
From what I can tell this is the same steps VSTS follows when you use the dialog, we are just able to do it in bulk using code ![]()
Conclusion
The VSTS team makes api's for everything and then use those apis for themselves as well. Odds are if you need to automate a couple manual tasks that you perform in VSTS or TFS that the API's are documented (REST API Overview for Visual Studio Team Services and Team Foundation Server) and you can very easily create gems like the one described in this post ![]() .
.

